
VisualMicro Arduino IDE For Visual Studio
Legacy Arduino IDE. Use of the legacy Arduino IDE is not recommended, and support for the legacy Arduino IDE will be removed in a future version of the extension. The legacy Arduino IDE can be installed from the Arduino download page. The supported legacy Arduino IDE versions are 1.6.x and up to, but not including, 2.0.0.
Arduino IDE for Visual Studio 2022 Visual Studio Marketplace
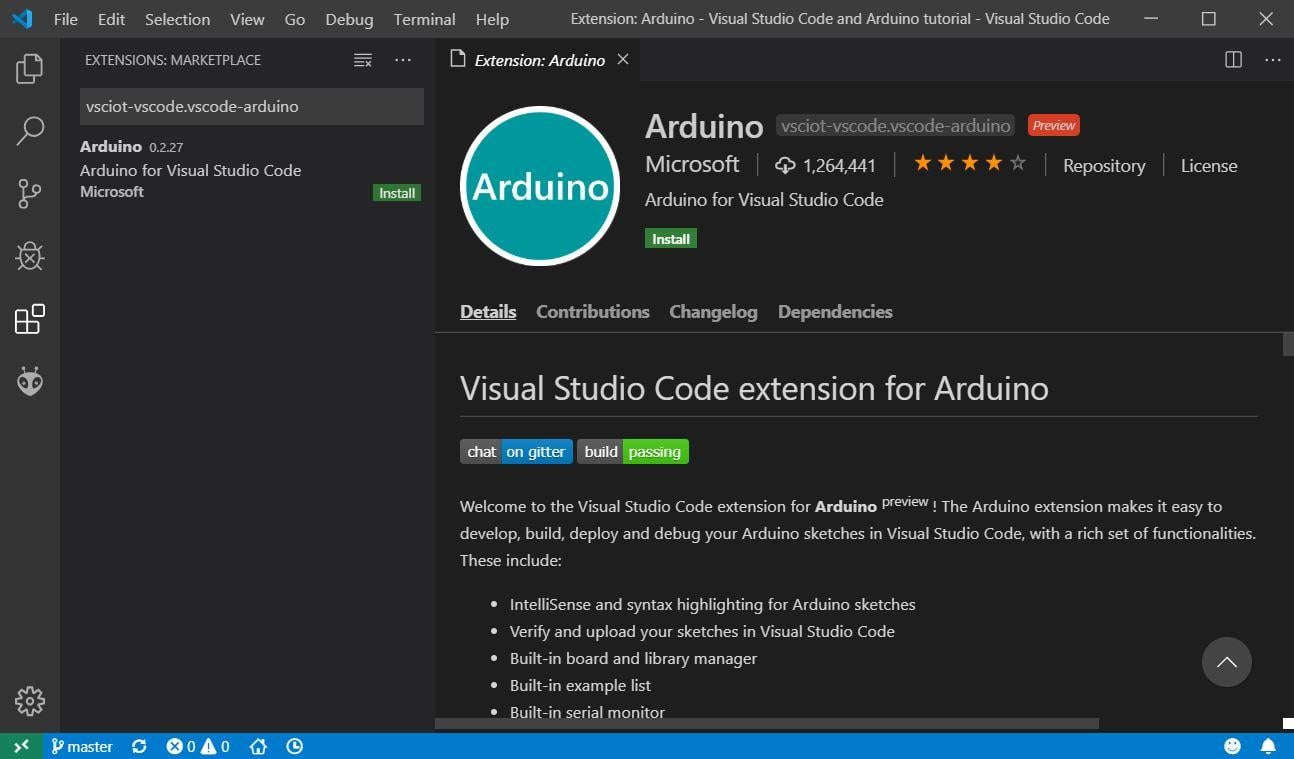
Installing Visual Studio Code. Go to the Visual Studio Code download page and download the version corresponding to your OS. To communicate with Arduino, you need to install the corresponding extension. Click on the "Manage" icon (cogwheel) at bottom left and select Extensions (or Ctrl+Shift+X) Then search for Arduino and select "Arduino.
Visual studio 2019 arduino ide
1. Download & Install Visual Studio from Microsoft for free. 2. Download & Install an Arduino Compatible IDE for full compatability (Arduino/Energia) 3. Install the Arduino Extension from within Visual Studio. 4. Start developing your next Arduino project at the click of a button. 5.
Arduino + Visual Studio = Fast Dev. Arduino Project Hub
After clicking a purchase option on this page you will have an opportunity to review your order, to select a payment method and a different currency. Buy the full pro version of visual micro. Starts at $24.99. Evaluate for 45 days for free with all features available.
Arduino IDE for Visual Studio
How to Install the Plugin. Start Visual Studio and use the top menu bar to navigate to "Tools" and then choose "Extensions and Updates…": In the window that opens, select "Online" on the left-hand side and then search for "Arduino IDE for Visual Studio". After you find the correct extension, click "Download":
VisualMicro Arduino IDE For Visual Studio
Step 4: Creating Your .ino File With a Reference to VSPDE.h. Now we're going to create our first .ino file. fear not, a .ino file is nothing but a .cpp file, the only difference in here is the extension. As the screenshots, follow the steps below to create your .ino file. Right click on your solution; Add;

Arduino IDE for Visual Studio
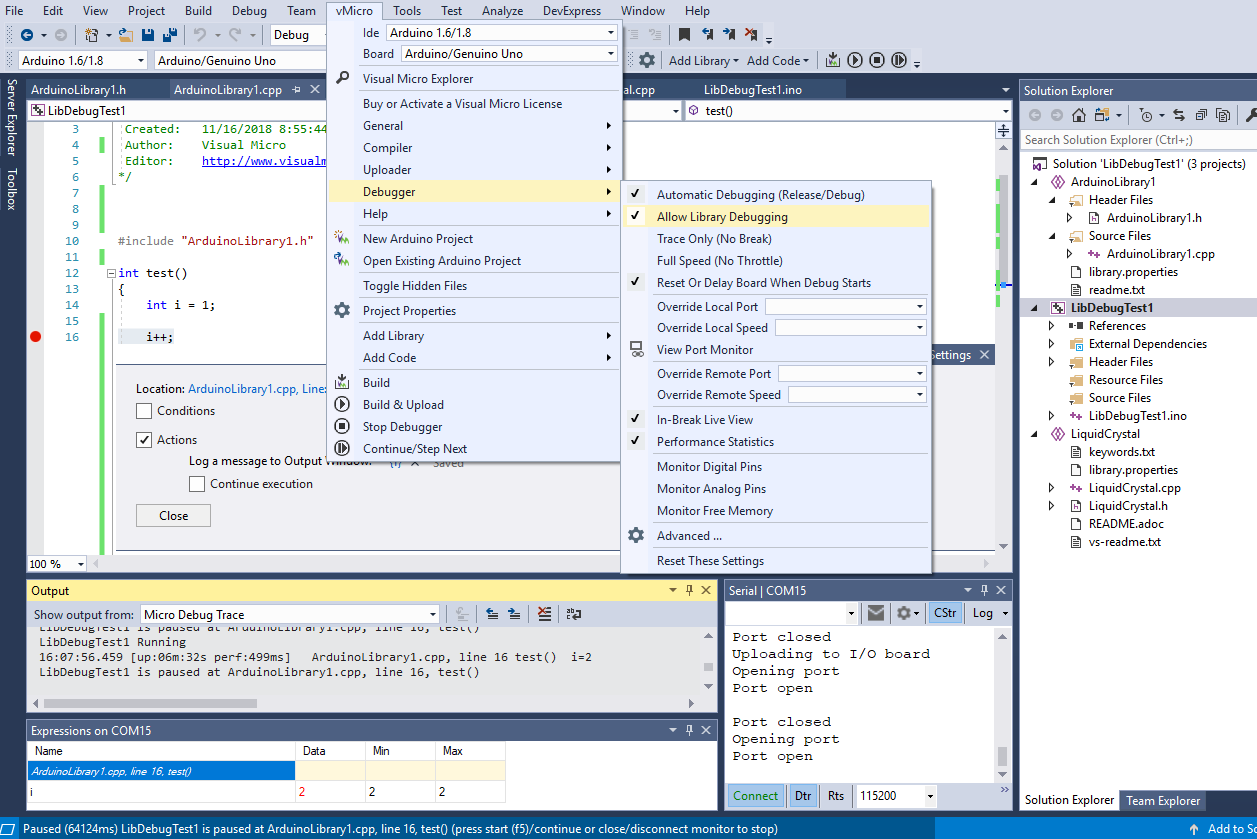
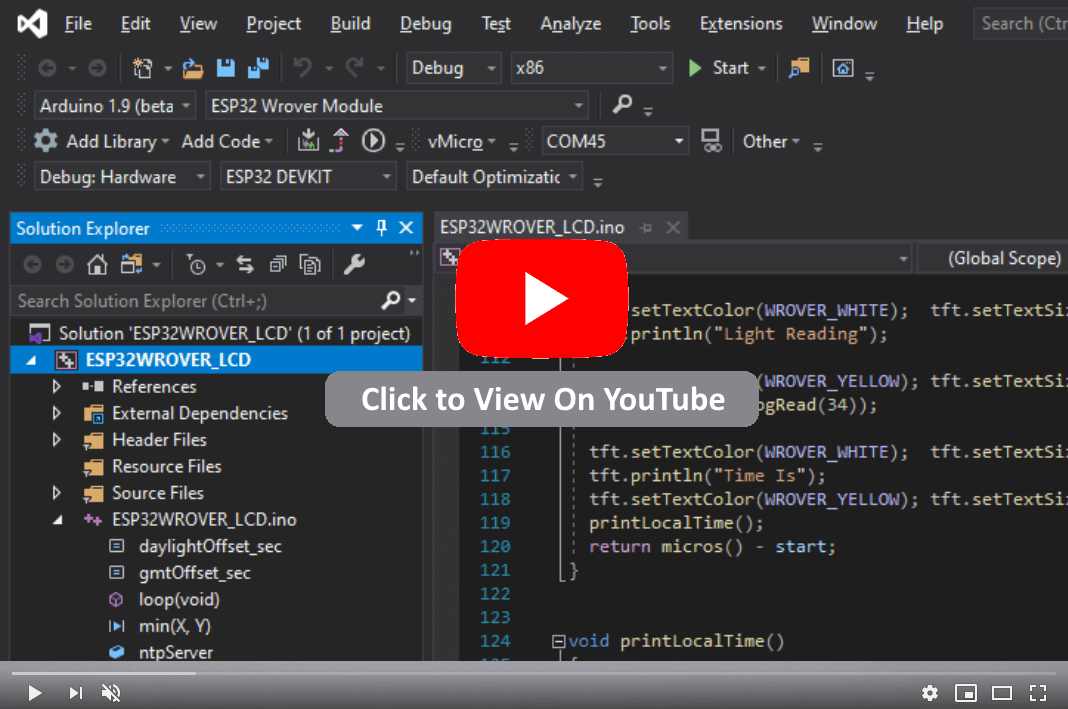
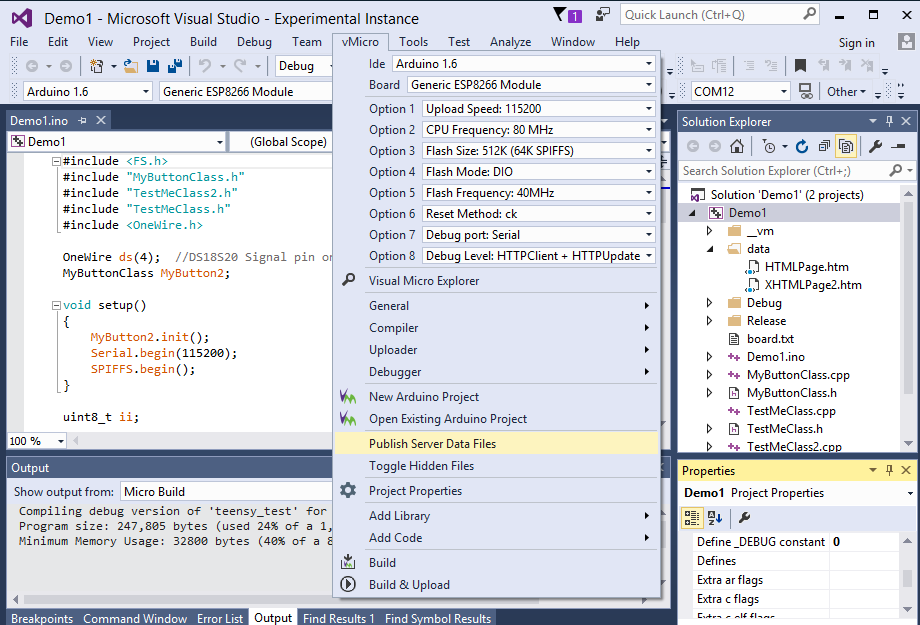
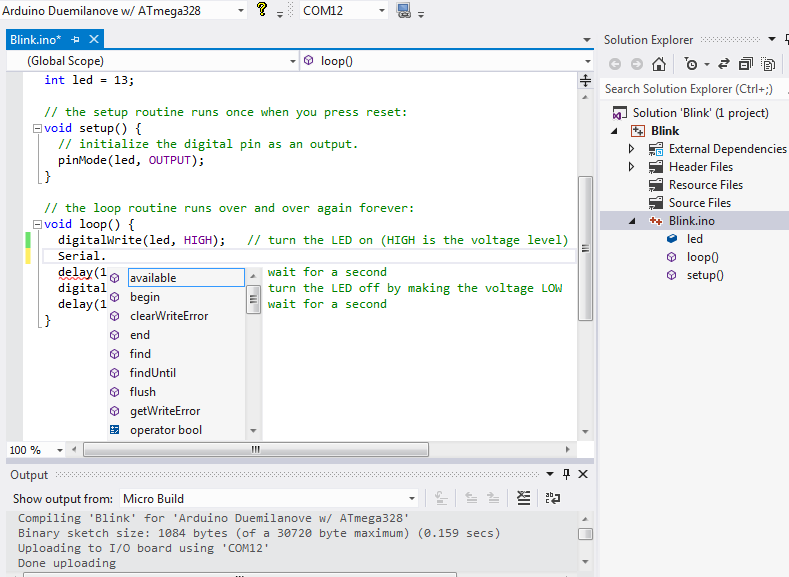
Installing the Arduino IDE for Visual Studio add-in creates two new menus and several button bars. The main menu is vMicro (Fig. 6) because it has a series of commands that allow us, for example, the following operations: select the IDE; in our case, we will use Visual Micro (No IDE), because we will not use the standard Arduino IDE;
Arduino ESP8266 in the Visual Studio IDE
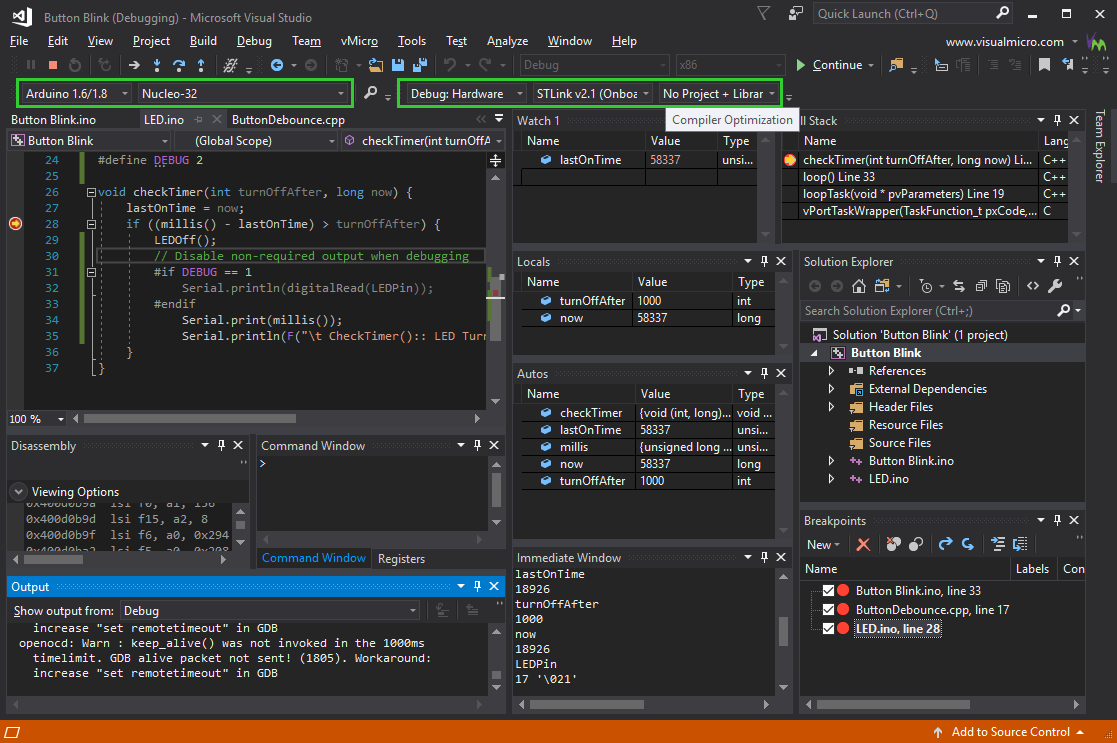
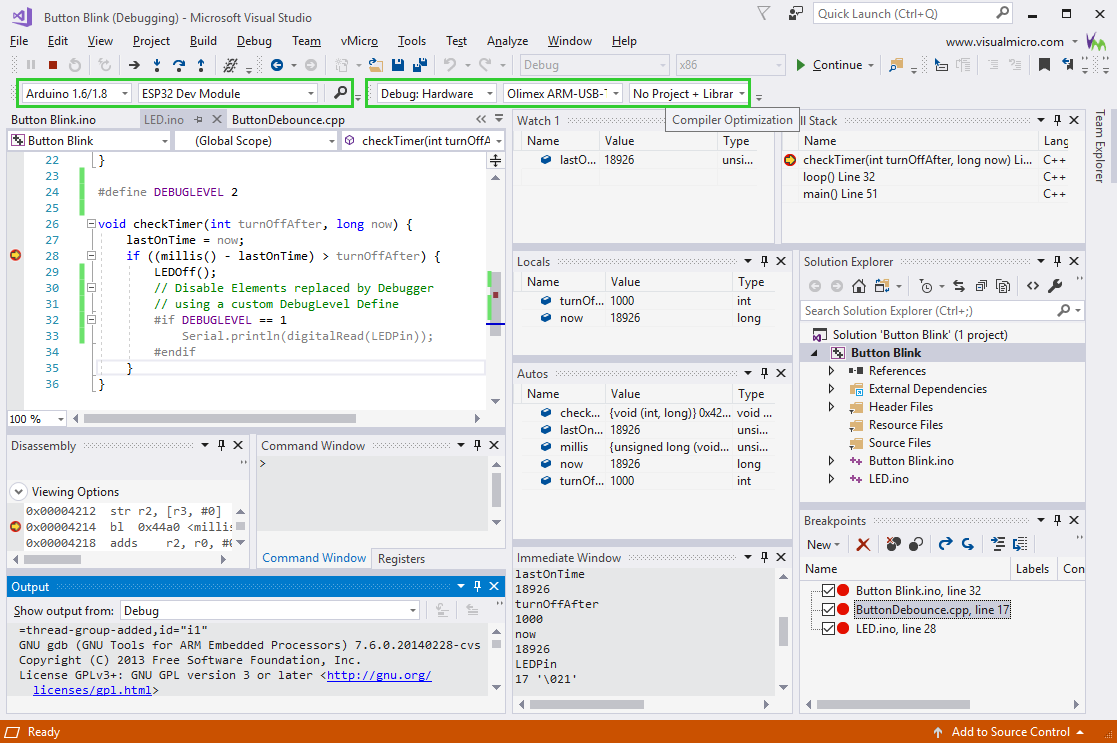
The VisualMicro extension for Visual Studio adds some useful features for developing Arduino applications that the standard Arduino IDE is lacking. One such feature is the debugger, which helps you find errors in your programs. In this article, we'll go over the basics of the debugging feature and how it works.
How to Use Visual Studio Code for Arduino Arduino Maker Pro
Click on File->Open->Arduino Project. Select an existing sketch in the Arduino project directory. Once the project has loaded and opened, select a board from the Boards toolbar. Select a programmer from vMicro->Uploader->Hardware Programmer. Press the Blue tool bar arrow or SHIFT+F5 for compile and upload (Debug>Start without debugging)
Arduino IDE for Visual Studio Visual Studio Marketplace
Click on

Writing Arduino Code using Visual Studio and Visual Micro Gears of Resistance
Extension for Visual Studio - Fully Arduino compatible IDE. Edit, deploy and debug. Manage libraries & boards. Unique Serial Debugger for any board including full speed debugging, break/trace points with timing and function call features. Code remains compatible with the Arduino IDE. Extended options for.
Arduino IDE for Visual Studio
Arduino IDE: A cross-platform application integrated development environment *. It makes it easy to write code and upload it to the board. It runs on Windows, Mac OS X, and Linux. The environment is written in Java and based on Processing and other open-source software; * Visual Studio:** State-of-the-art tools and services that you can use to.
Programando Arduino com Visual Studio Code YouTube
Visual Micro supports projects that contain one or more .ino code files and standard c++ cource code files, just like the Arduino IDE. The full Visual Studio IDE is available for free for full time students, open source and independant developers. Visual Micro also offers a number of additional features over the Arduino IDE such as:- multiple.

Let’s program Arduino with Microsoft Visual Studio 2017 Open Electronics Open Electronics
If a Visual Studio or Microchip IDE is installed, then Visual Micro can be installed. If the install fails, RIGHT CLICK > OPEN WITH > Visual Studio Version Selector. NOTE: Atmel/Microchip Studio is useful for Atmel and Microchip hardware only. If you are new to Visual Micro, click the relevant Tab below to learn about the installation process:

Visual Micro Arduino Programming with Visual Studio Coding MegunoLink
Alternatively, you can us the "Clone or Download" > "Download ZIP" buttons in GitHub's web interface to download the library. Open VS Code, then open your Arduino library folder by navigating to File > Open Folder.. (or tap CTRL+K then CTRL+O.) Then select the Arduino library folder you'd like to open in the IDE.
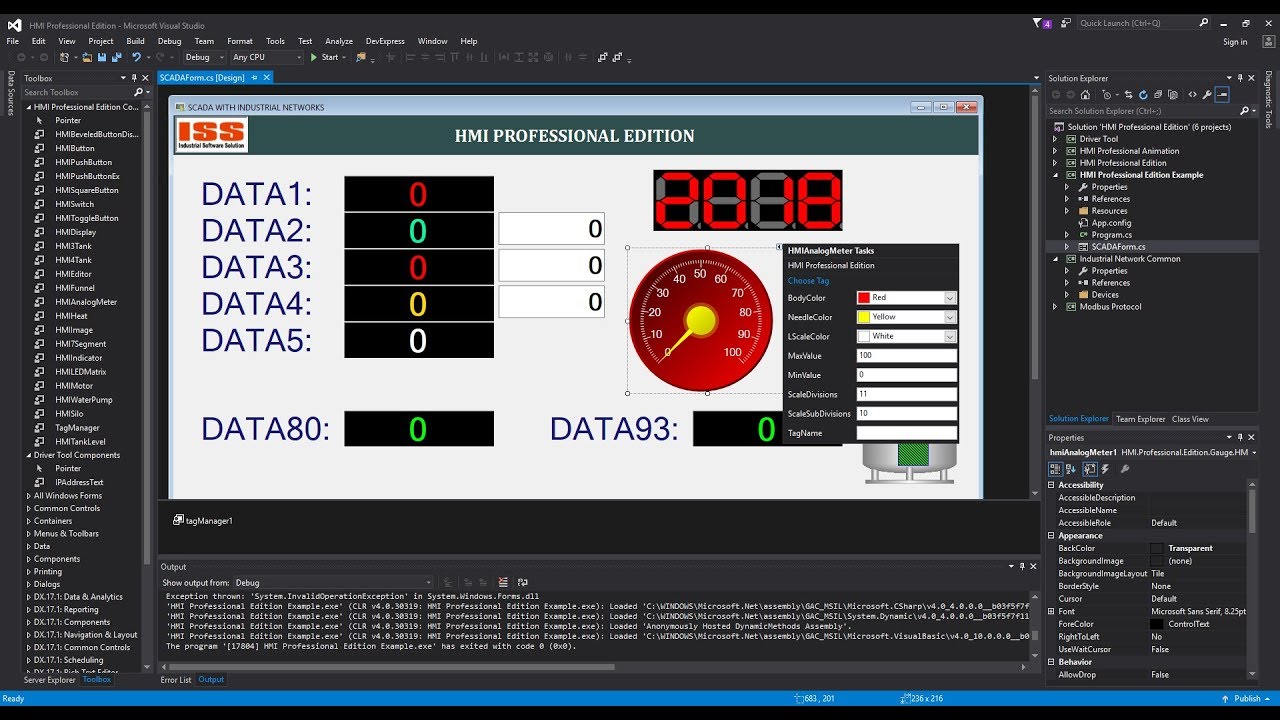
Arduino Hmi With Visual Studio 2013 Graphical Interface FerisGraphics
As a follow-up to my previous post, where I talked about using Visual Studio for Arduino development, this post will be providing an abridge guide to set it up correctly with Visual Micro's Arduino IDE for Visual Studio extension. There will also be a configuration guide to enable STM32 build and deployment. Prerequisites steps
